Temperature control makes or breaks sourdough starter success. Leave your jar on a cold windowsill in winter, and fermentation stalls for 24 hours or more between peaks. Move it above a radiator, and the same starter peaks in four hours—then collapses before you’re ready to feed it. The difference between thriving cultures and struggling ones often comes down to understanding how temperature affects fermentation speed, microbial activity, and the balance between wild yeast and lactic acid bacteria.
The ideal range for most sourdough starters sits between 24–27°C (75–80°F). Within this window, wild yeast and lactobacillus bacteria multiply at predictable rates. Below 20°C, fermentation slows dramatically. Above 28°C, things accelerate, and you risk overproofing before you’re ready to bake. Temperature consistency matters more than finding the “perfect” degree—your starter adapts to its environment, but fluctuations create unpredictable behaviour that wastes time and flour.
Why Temperature Control Matters for Sourdough Starter Health
Temperature dictates fermentation speed. When you warm your starter, yeast and bacteria become more active—they eat faster, multiply faster, and produce gas more quickly. Conversely, cold temperatures slow everything down. This directly affects the chemical processes happening inside your culture. Wild yeast and lactobacillus thrive at specific temperature ranges, and their activity rates shift dramatically with even small changes.
What makes temperature control particularly important is consistency. A starter held at a steady 24°C will develop a predictable rhythm. You’ll know roughly when it peaks, when to feed it, and when it’s ready for baking. Meanwhile, a starter in an unheated kitchen that fluctuates between 18°C and 22°C becomes guesswork. You might leave it for what should be eight hours and return to find it barely risen, or leave it for six hours and discover it’s collapsed.
Temperature also influences the balance of your microbial ecosystem. Colder conditions favour certain bacteria over others, sometimes producing flavours that are more acidic or less pleasant. Warmer conditions encourage faster yeast activity relative to bacterial fermentation. For consistent, high-quality bread, maintaining a stable temperature environment protects the character of your culture and ensures reproducible results.
How Microbial Activity Shifts with Temperature
The organisms in your starter—primarily Saccharomyces cerevisiae yeast and lactobacillus bacteria—have enzyme systems that work optimally within specific temperature bands. Below 15°C, activity approaches dormancy. Between 20–28°C, multiplication and gas production accelerate dramatically. Above 30°C, activity remains high but organisms begin to stress, and undesirable bacteria may start to dominate.
This is why cold fermentation schedules work: at 5°C, your starter barely changes over days or even weeks. But at 26°C, the same starter peaks in 4–6 hours. Temperature, therefore, is your primary lever for controlling fermentation timing without changing feeding ratios or flour type.
Understanding Your Ideal Fermentation Temperature Range
Most bakers find success between 24–27°C. This range sits comfortably in the “sweet spot” where fermentation proceeds predictably without excessive speed. However, your specific ideal might shift slightly based on your starter’s composition and your local flour. Different flours ferment at different rates, and temperature adjustments can compensate for faster or slower varieties.
Here’s what to expect across different ranges:
- 18–20°C: Slow fermentation, 12–18 hours to peak. Useful for overnight bulk fermentation but risks overproofing if left too long.
- 22–24°C: Moderate fermentation, 6–10 hours to peak. Good for a standard daytime schedule.
- 24–27°C: Active fermentation, 4–6 hours to peak. The goldilocks zone for most home bakers.
- 28–30°C: Very active fermentation, 2–4 hours to peak. Fast but harder to catch the right moment. Risk of overproofing increases.
- Above 30°C: Extremely fast, unpredictable, and stressful for the culture. Avoid unless intentionally cold-retarding dough.
In practice, starting with 25–26°C helps most beginners develop reliable habits. Once you’re comfortable reading your starter’s behaviour, you can experiment with slightly cooler or warmer conditions based on your schedule and preference.
Room Temperature vs. Controlled Environment
Your kitchen’s ambient temperature sets the baseline. In winter, an unheated kitchen might hover around 16–18°C; in summer, it could reach 26–28°C easily. If you’re in a temperate climate with seasonal swings, your starter’s behaviour will shift month to month unless you create a controlled microclimate.
This doesn’t mean expensive equipment. It means understanding what you have and working with it deliberately rather than fighting it.
Practical Methods for Temperature Stability
Temperature stability is achievable without special gadgets. The simplest approach is choosing a warm spot in your home and monitoring it consistently. However, several proven methods work well for most home bakers.
Low-Tech Solutions
A kitchen windowsill in direct sunlight can stay 2–3°C warmer than the room. Placing your starter jar on a shelf above a radiator creates a warm zone. A cupboard or drawer insulates against temperature swings and maintains a steadier microclimate than open air. In winter, a proofing box—even a simple insulated cooler with a heat source—keeps temperature stable.
Many bakers rely on a thermostat-controlled heat mat or belt, originally designed for plant propagation. These are inexpensive, reliable, and allow you to set and forget. You place the jar on the heat mat and monitor temperature with a simple thermometer. This method is particularly useful in winter or cold climates.
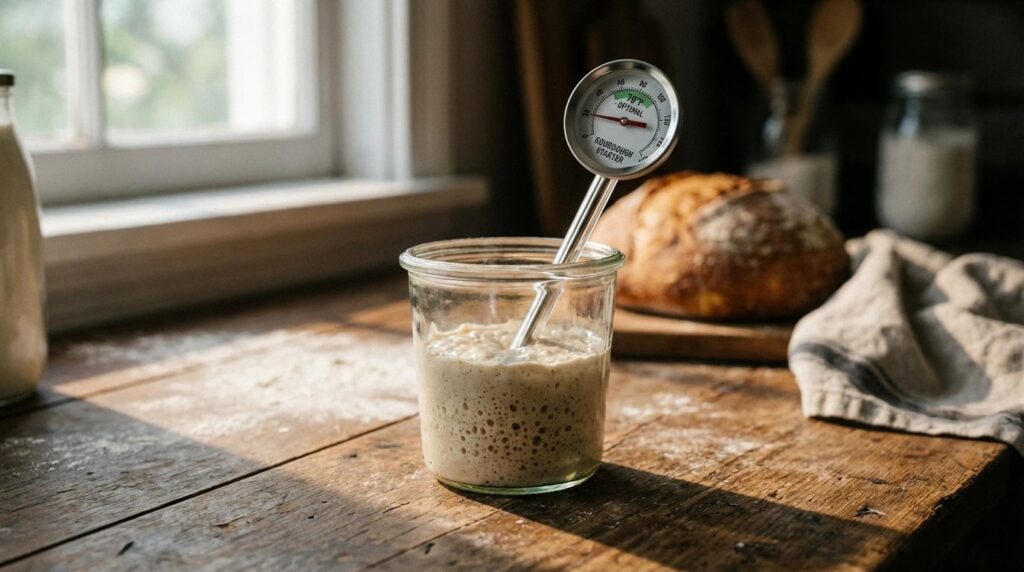
Using an Instant-Read Thermometer
Invest in a cheap instant-read thermometer or a small digital probe thermometer. Place it in your starter jar (without touching the sides) to check temperature regularly. Record the temperature and the time your starter peaks over a week or two. You’ll quickly see correlations between temperature and fermentation speed in your specific environment.
This removes guesswork. Instead of wondering why your starter behaves differently some days, you’ll have actual numbers linking temperature to outcomes. Understanding why your sourdough isn’t rising often begins with temperature checks.
Creating a Proofing Box
A simple DIY proofing box costs almost nothing. Use a small cooler, a large plastic storage container, or even a cardboard box. Place a heating pad or heat belt inside (available online for under £20), position your starter jar on a rack above it, and monitor temperature with a thermometer. Drape a cloth or cover loosely to hold heat while allowing airflow.
Alternatively, some bakers use their oven’s light. Modern ovens generate enough heat from the bulb alone to maintain 24–26°C in a closed oven when the heating element is off. Check your oven temperature with a thermometer before relying on this method.
Seasonal Adjustments
In summer, your uncontrolled kitchen might be too warm. Moving your starter to a cooler location—a basement, shaded cupboard, or even the fridge between feedings—helps. In winter, you’ll need active warming. Most home bakers find they need warming solutions only in the colder months, then switch to passive methods or no intervention in summer.
Adjusting Feeding Schedules by Season and Environment
Temperature and feeding frequency are linked. A warmer starter needs feeding more often because fermentation is faster. A cooler starter can go longer between feeds. Rather than rigidly adhering to “feed every 12 hours,” adjust your schedule based on how quickly your starter actually rises and falls.
Creating a Feeding Log
Track temperature, time since last feeding, and whether your starter has peaked or is still rising. After a week or two, patterns emerge. You might discover that at 25°C, your starter reliably peaks in 5 hours, suggesting a natural 12-hour feeding cycle. At 22°C, it takes 8 hours, suggesting a 16-hour cycle works better.
A simple notebook or spreadsheet works fine. Note:
- Date and time of feeding
- Ambient temperature
- Time to peak (when the starter stops rising)
- Appearance (colour, activity, any unusual signs)
This personalises your approach and removes uncertainty. You’re no longer guessing; you’re responding to actual data.
Winter vs. Summer Routines
In winter with active heating, you might maintain 24–25°C consistently and feed every 12 hours. In summer, if your kitchen naturally reaches 27–28°C, feeding every 8–10 hours prevents overproofing. Some bakers temporarily refrigerate their starter in summer to slow fermentation and simplify scheduling—it’s a valid choice that wastes less flour.
Troubleshooting Common Temperature-Related Issues
When your starter misbehaves, temperature is often the culprit. Learning to diagnose temperature-related problems saves time and flour.
Starter Rises and Collapses Within Hours
This typically signals a warm environment (26–28°C or above). Your starter ferments so quickly that it peaks and then falls back before you feed it. Solution: move it to a cooler spot, check your thermometer, and reduce feeding frequency. If your kitchen is simply warm, accept that your schedule will be faster and plan accordingly.
Starter Barely Rises, Takes 24+ Hours Between Feedings
A cold environment (below 20°C) slows fermentation drastically. Your starter isn’t dead—it’s just dormant. Warm it up. Use a heat mat, place it above a radiator, or move it to a warmer room. If you prefer a slower schedule, this can work, but most bakers find active feeding cycles more manageable.
Unpredictable Behaviour—Peaks Vary Wildly
Temperature fluctuations are the primary cause. Your starter responds to each day’s ambient temperature, so it behaves inconsistently. Stabilise temperature first, then observe behaviour for a week before adjusting feeding schedules again.
Weak Starter Activity Despite Regular Feeding
If your starter is fed regularly but shows little rise or few bubbles, temperature might be too low for vigorous fermentation, or the jar location might be creating a cold microclimate. Check the temperature inside the jar, not just the room. Place it somewhere warmer for a few days to observe improvement.
Additionally, beginner starters sometimes need time to establish strength. A young culture is naturally weaker. But if it’s been active for weeks and still shows little vigour at a proper temperature, reassess your feeding ratio or flour choice.
Separation or Liquid (Hooch) on Top
A layer of brownish liquid sitting on your starter indicates it’s been too long since the last feeding, or the environment is warmer than expected. The bacteria and yeast consumed available food and produced acid, creating the liquid. Feed immediately, and monitor temperature. If your kitchen is warmer than you realised, increase feeding frequency.
This isn’t dangerous—hooch is edible and can be stirred back in—but it signals your feeding schedule doesn’t match your current temperature environment.
Moving Forward with Confidence
Start by identifying your kitchen’s natural temperature range and invest in a simple thermometer. Spend one week tracking how your starter behaves at different temperatures. This single step gives you the information to build a sustainable routine that fits your space and schedule. Once you have that data, you’ll stop guessing and start responding to what your culture actually tells you.
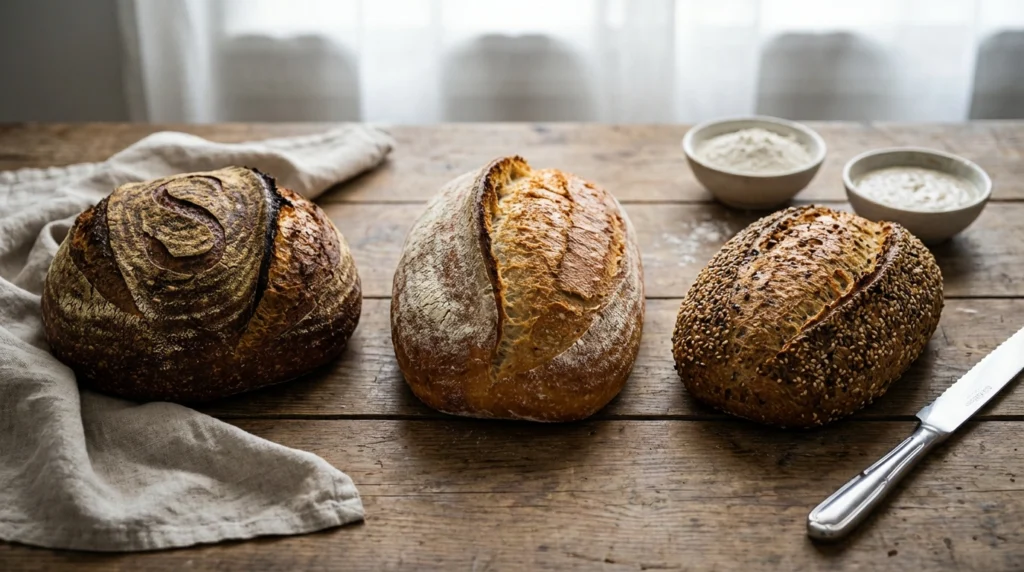
The goal isn’t laboratory precision. It’s consistency. A starter held steady at 23°C will behave predictably, whether that’s in your kitchen, a proofing box, or a cupboard. Once your starter’s rhythm matches your schedule, you’ve solved the biggest puzzle in sourdough baking. Recognising overproofed and underproofed dough becomes easier when fermentation timing is reliable.
For a deeper understanding of fermentation science, fermentation (Wikipedia) provides excellent context on how microorganisms respond to environmental conditions. If you have specific questions or want to discuss your starter’s behaviour, get in touch with us—we’re here to help you develop a routine that works.